For our new work, we are going to be building two different antennas (specifically, a bi-quad antenna and a logarithmic periodic dipole antenna). The first will receive signals at a broader range, but at a weaker signal strength. The second will receive at a narrower range, but with a stronger signal.
Hopefully, we’ll be able to use the first one to roughly define the parameters we’re dealing with, and the second one to fine-tune it. We decided, on a whim, to name the first one Peter, and the second one Heather. Once they’re made, they will be pretty big, so it’ll be fun to travel around with them, on trains and in the fields.
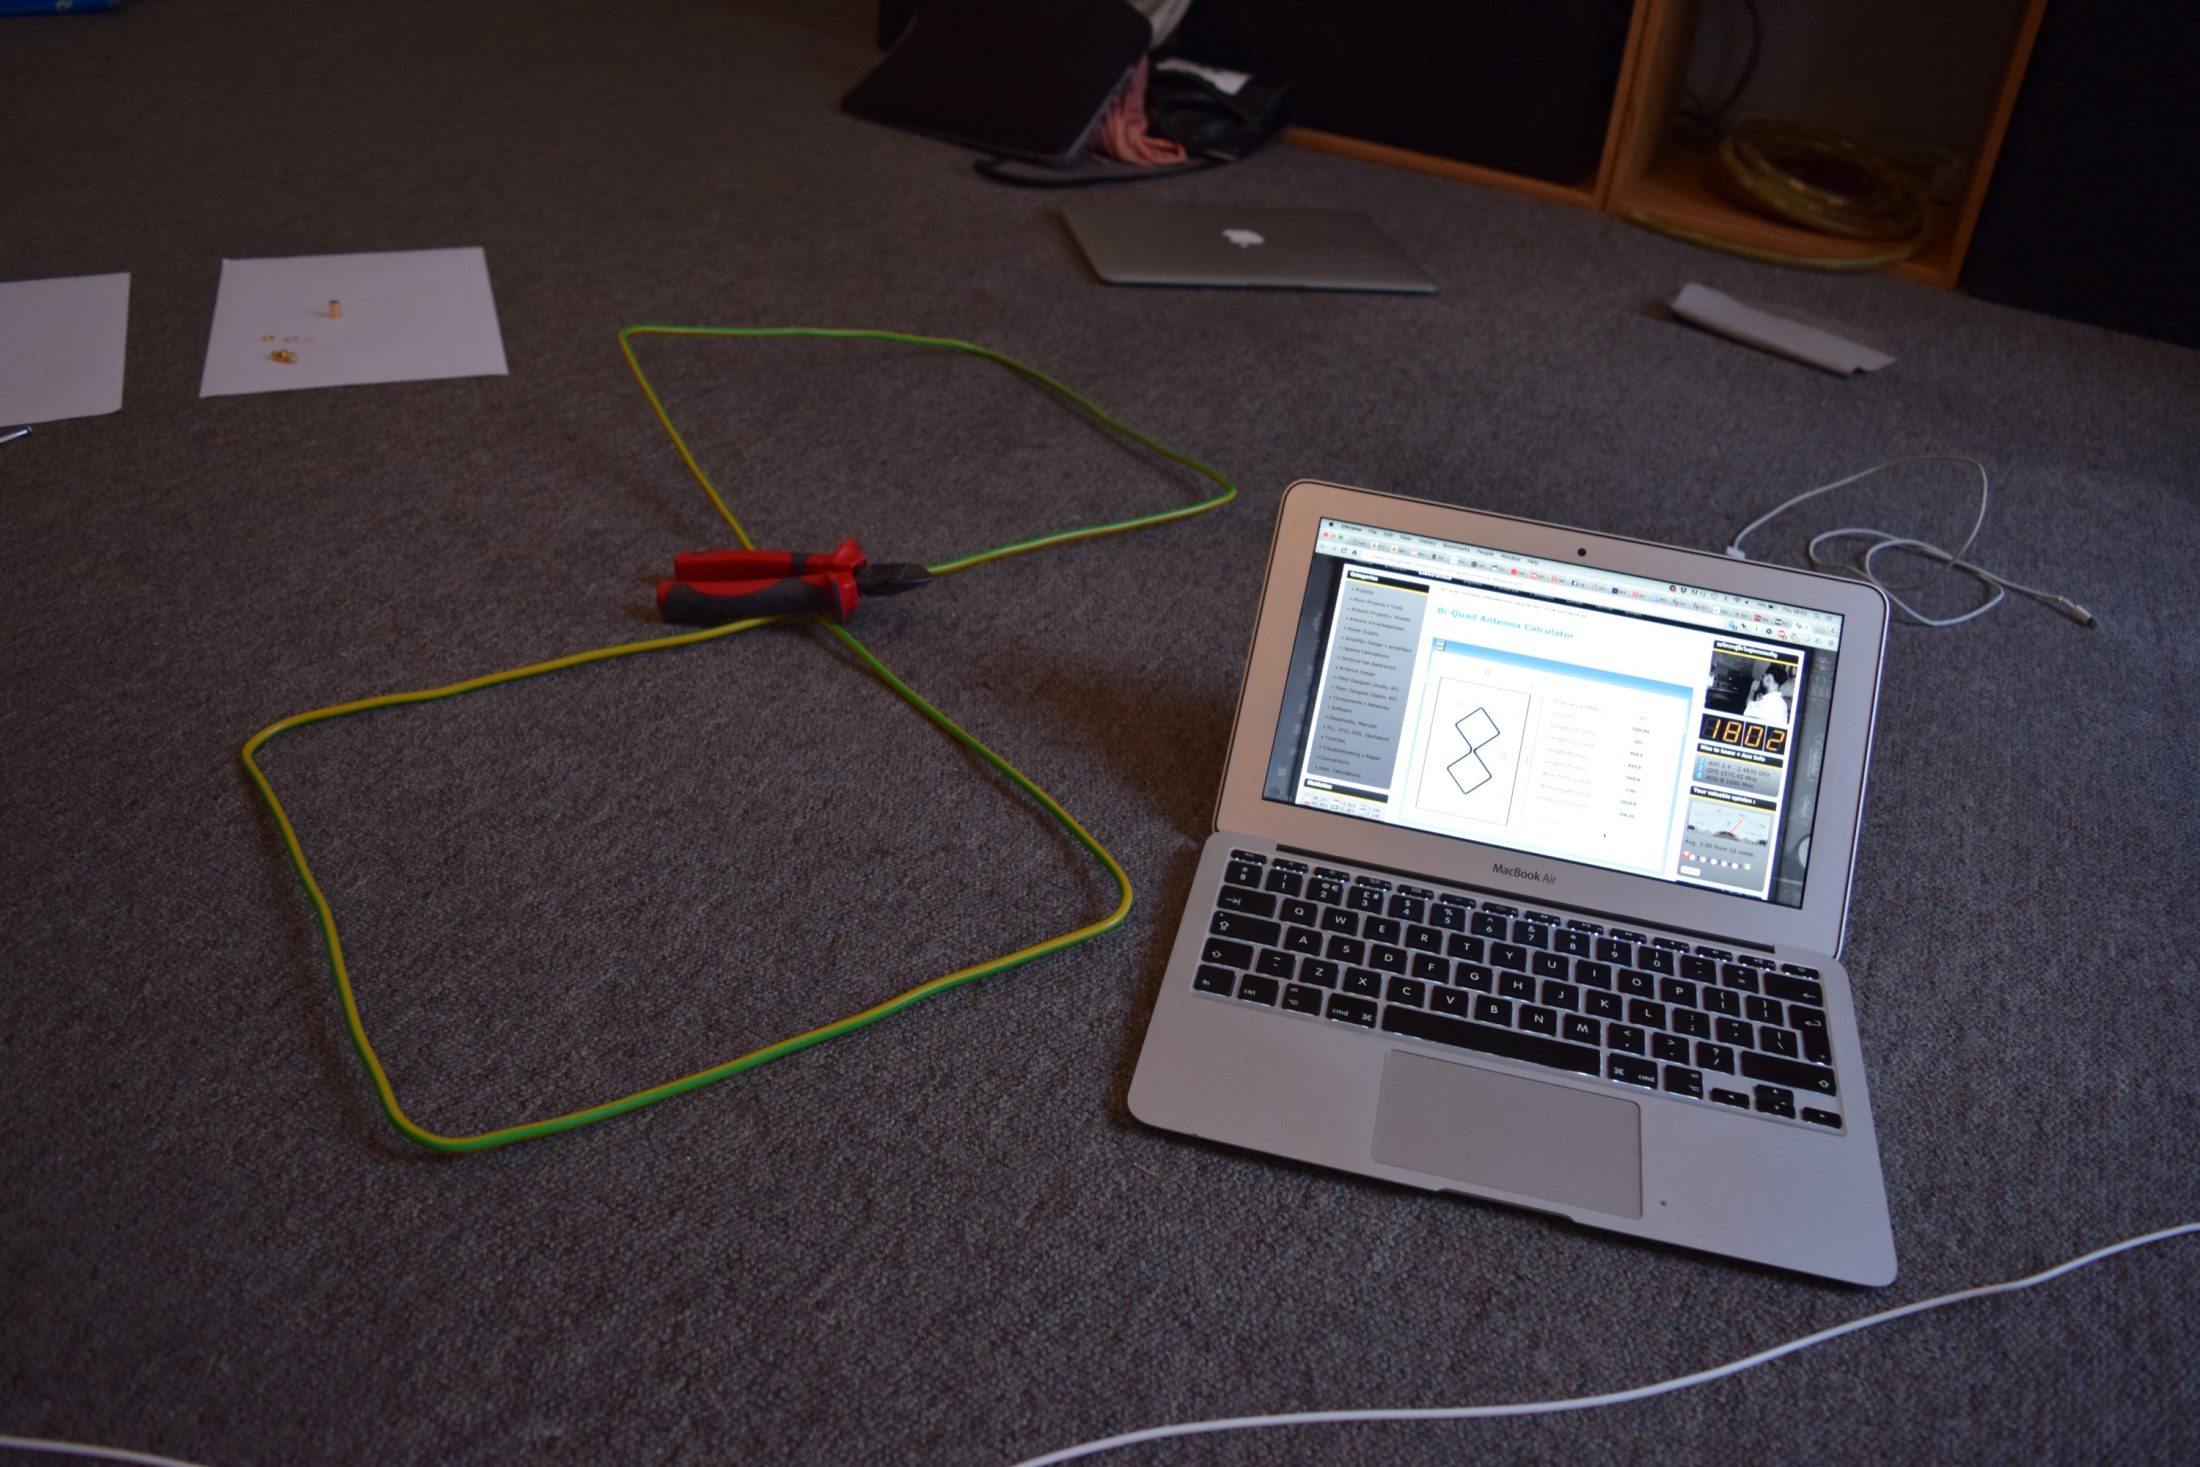
We’re using the antenna calculators for bi-quad and logarithmic periodic dipole available from the website of Ajarn Changpuak, which also has plenty of tasty Thai food recipes.
We only got the first one made today — Peter, the bi-quad antenna. Here’s how it went.
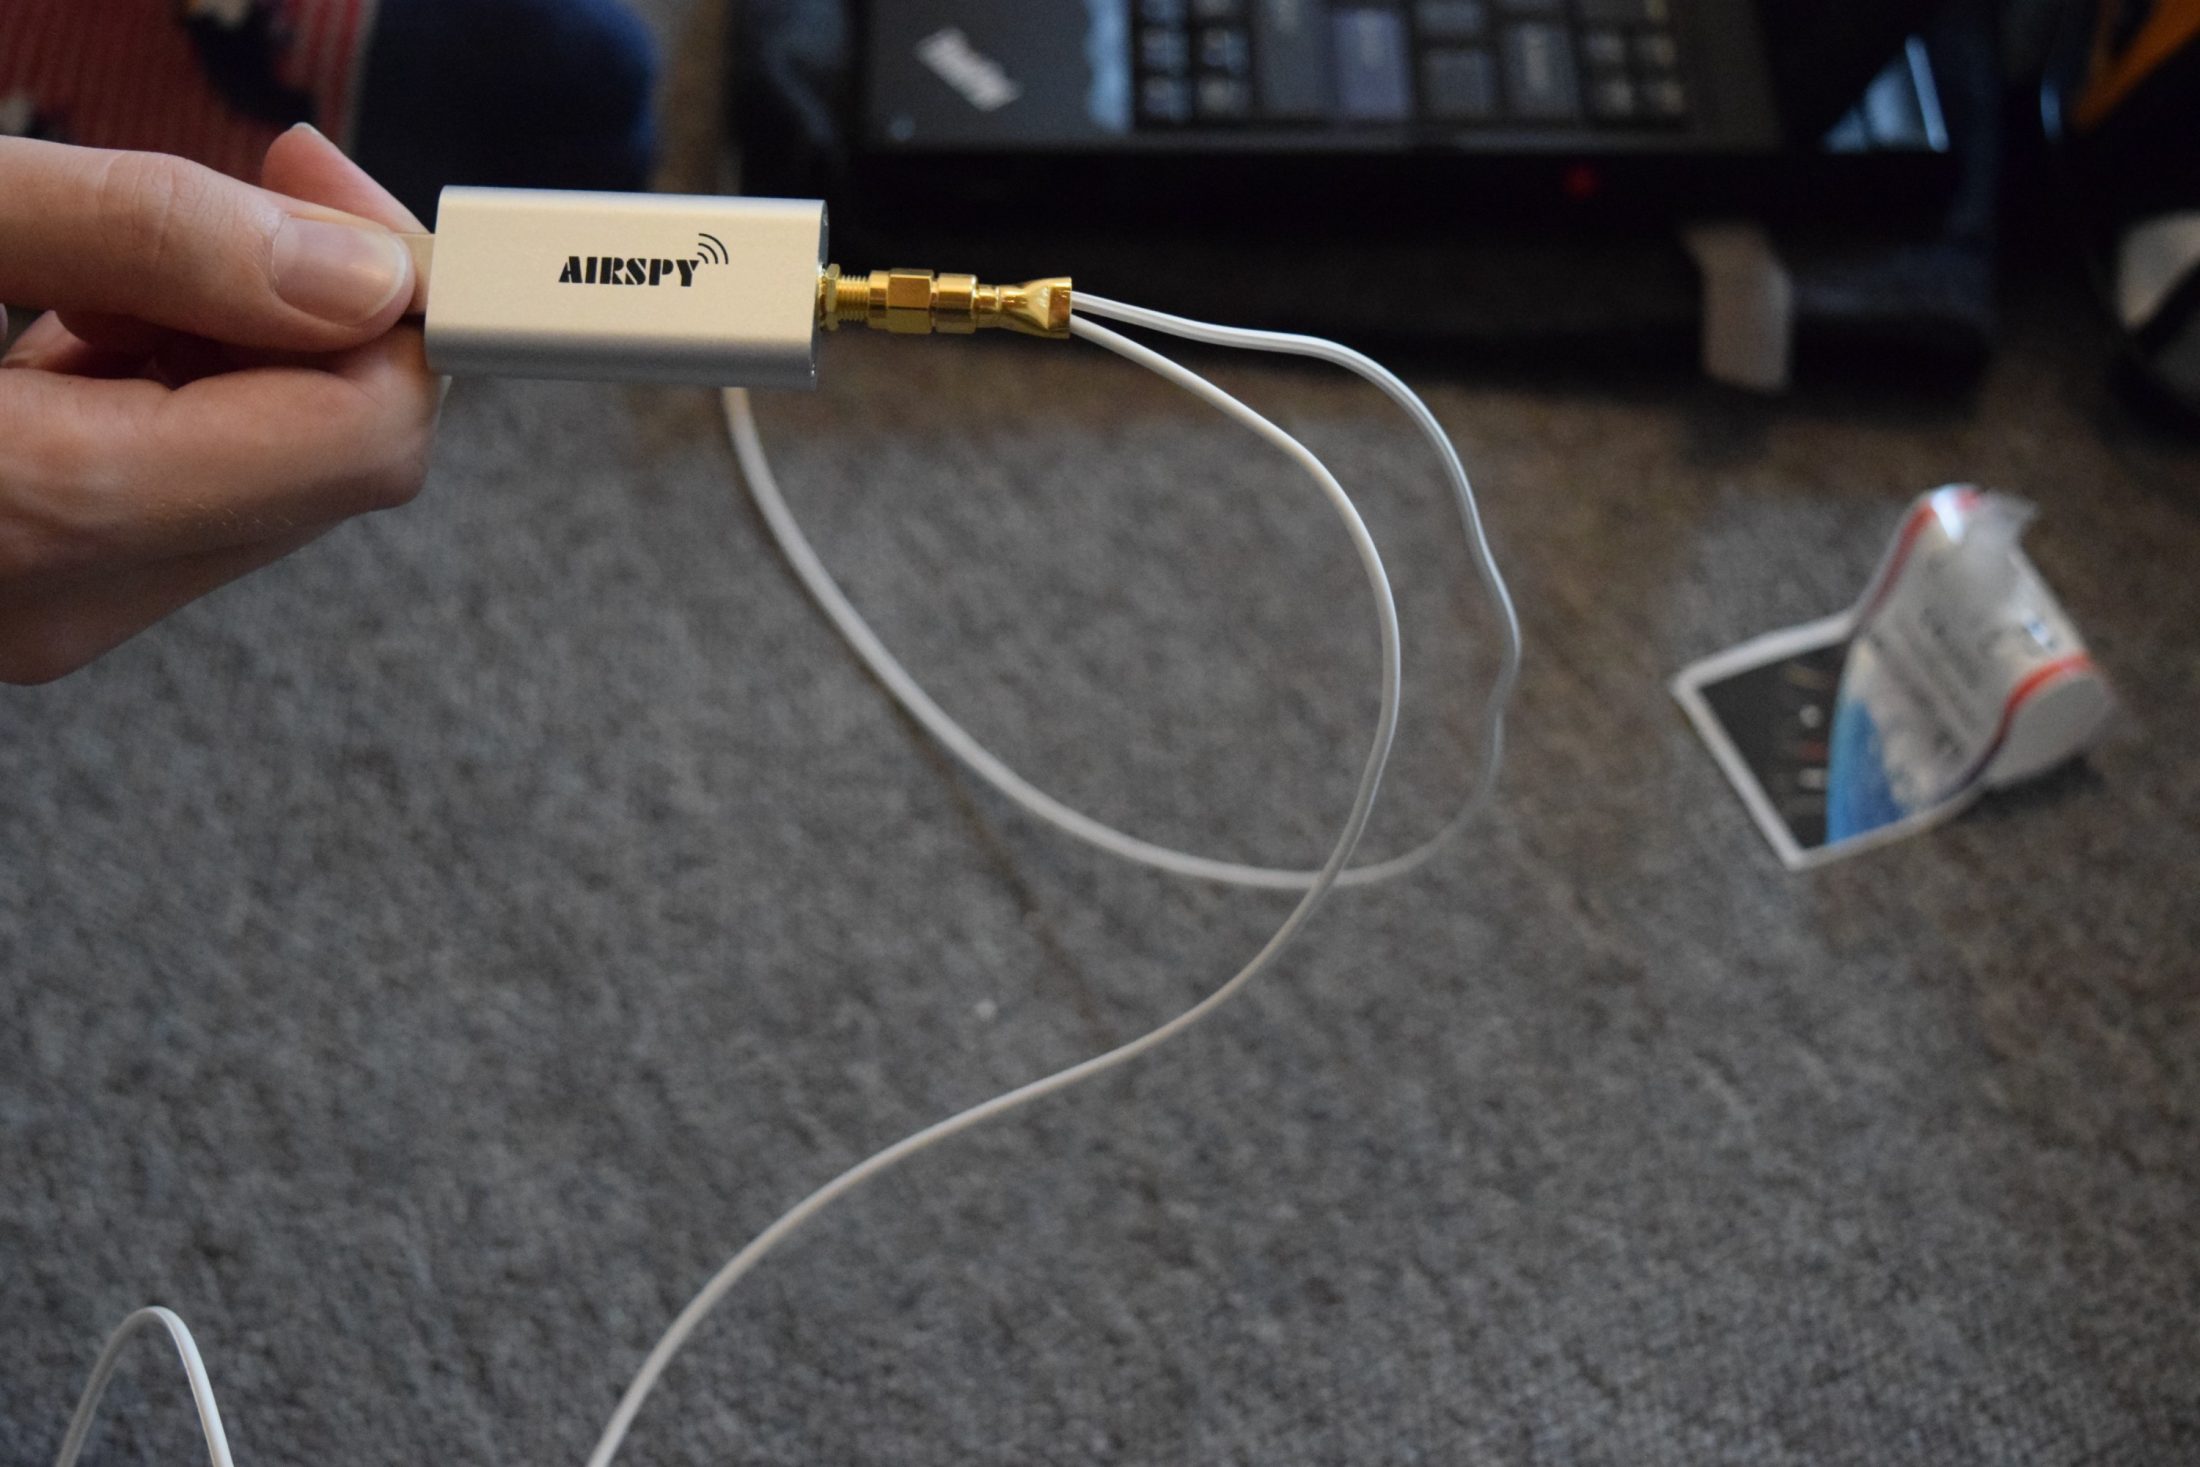
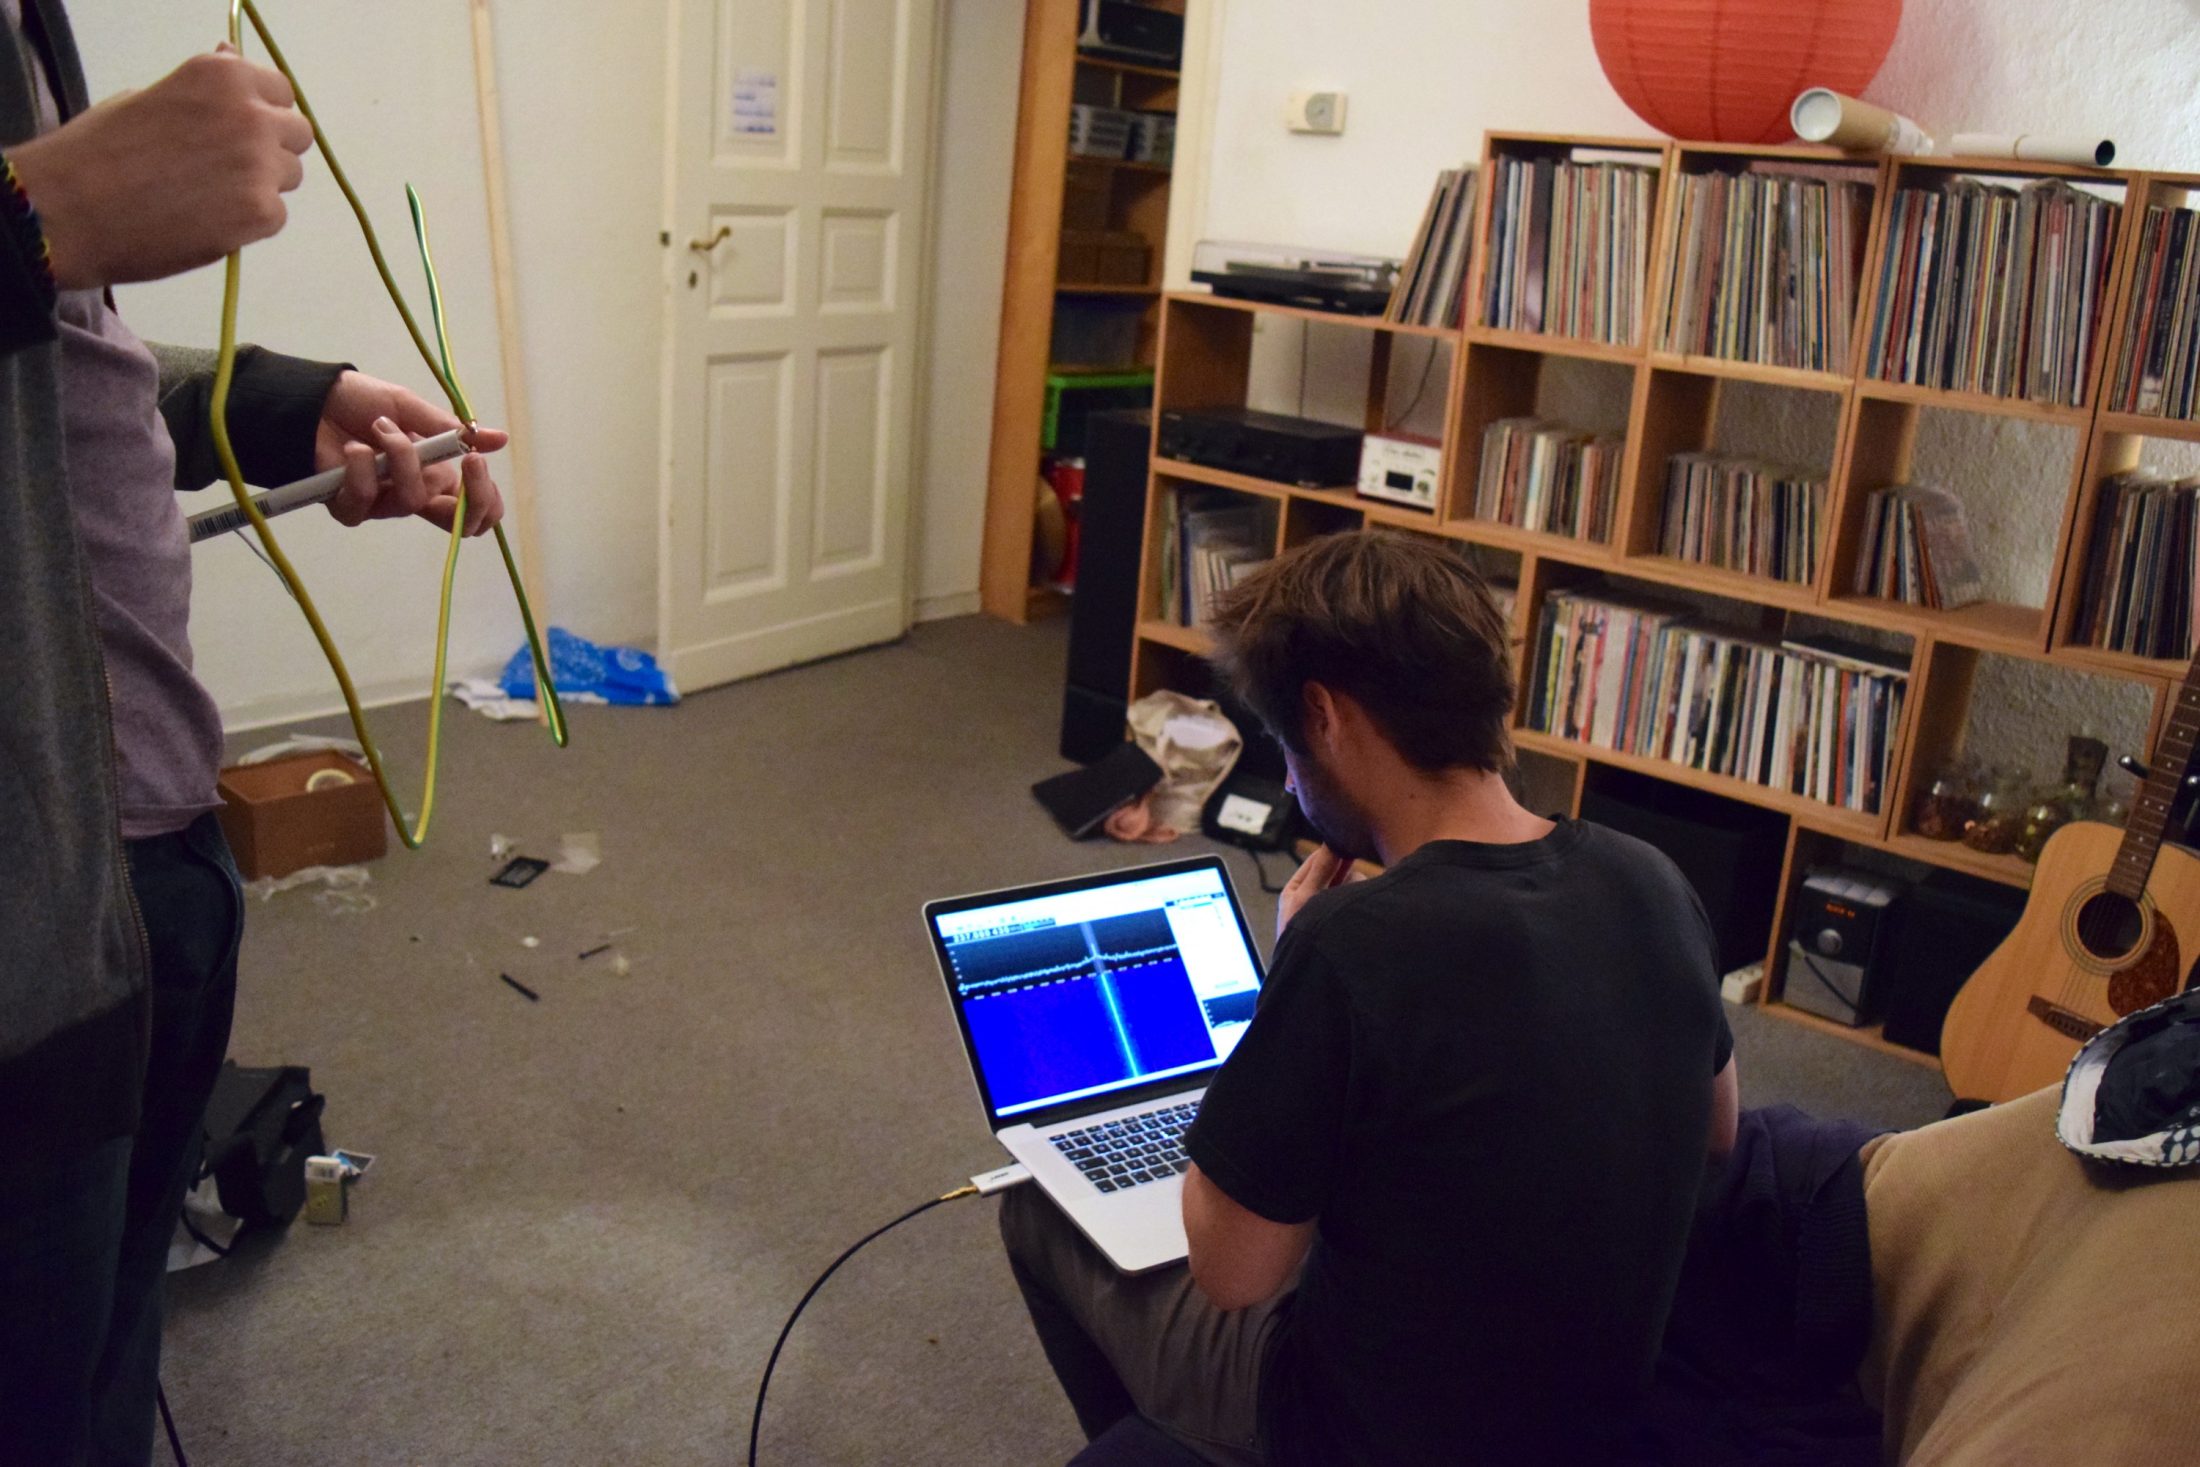
Step 1: Order an Airspy Mini, then check that it’s working.
We ordered one of these last week from Martin Lynch & Sons in the UK. It looks pretty much like a chunky USB stick, but it is a full-featured software-defined radio dongle.
To try it out, we attached the small antenna from an old wifi router. Not very sophisticated, but it works as a test. Meanwhile, we also used some copper cable as another test, to try to receive some signals at a lower, wider frequency range. Also worked. Great!
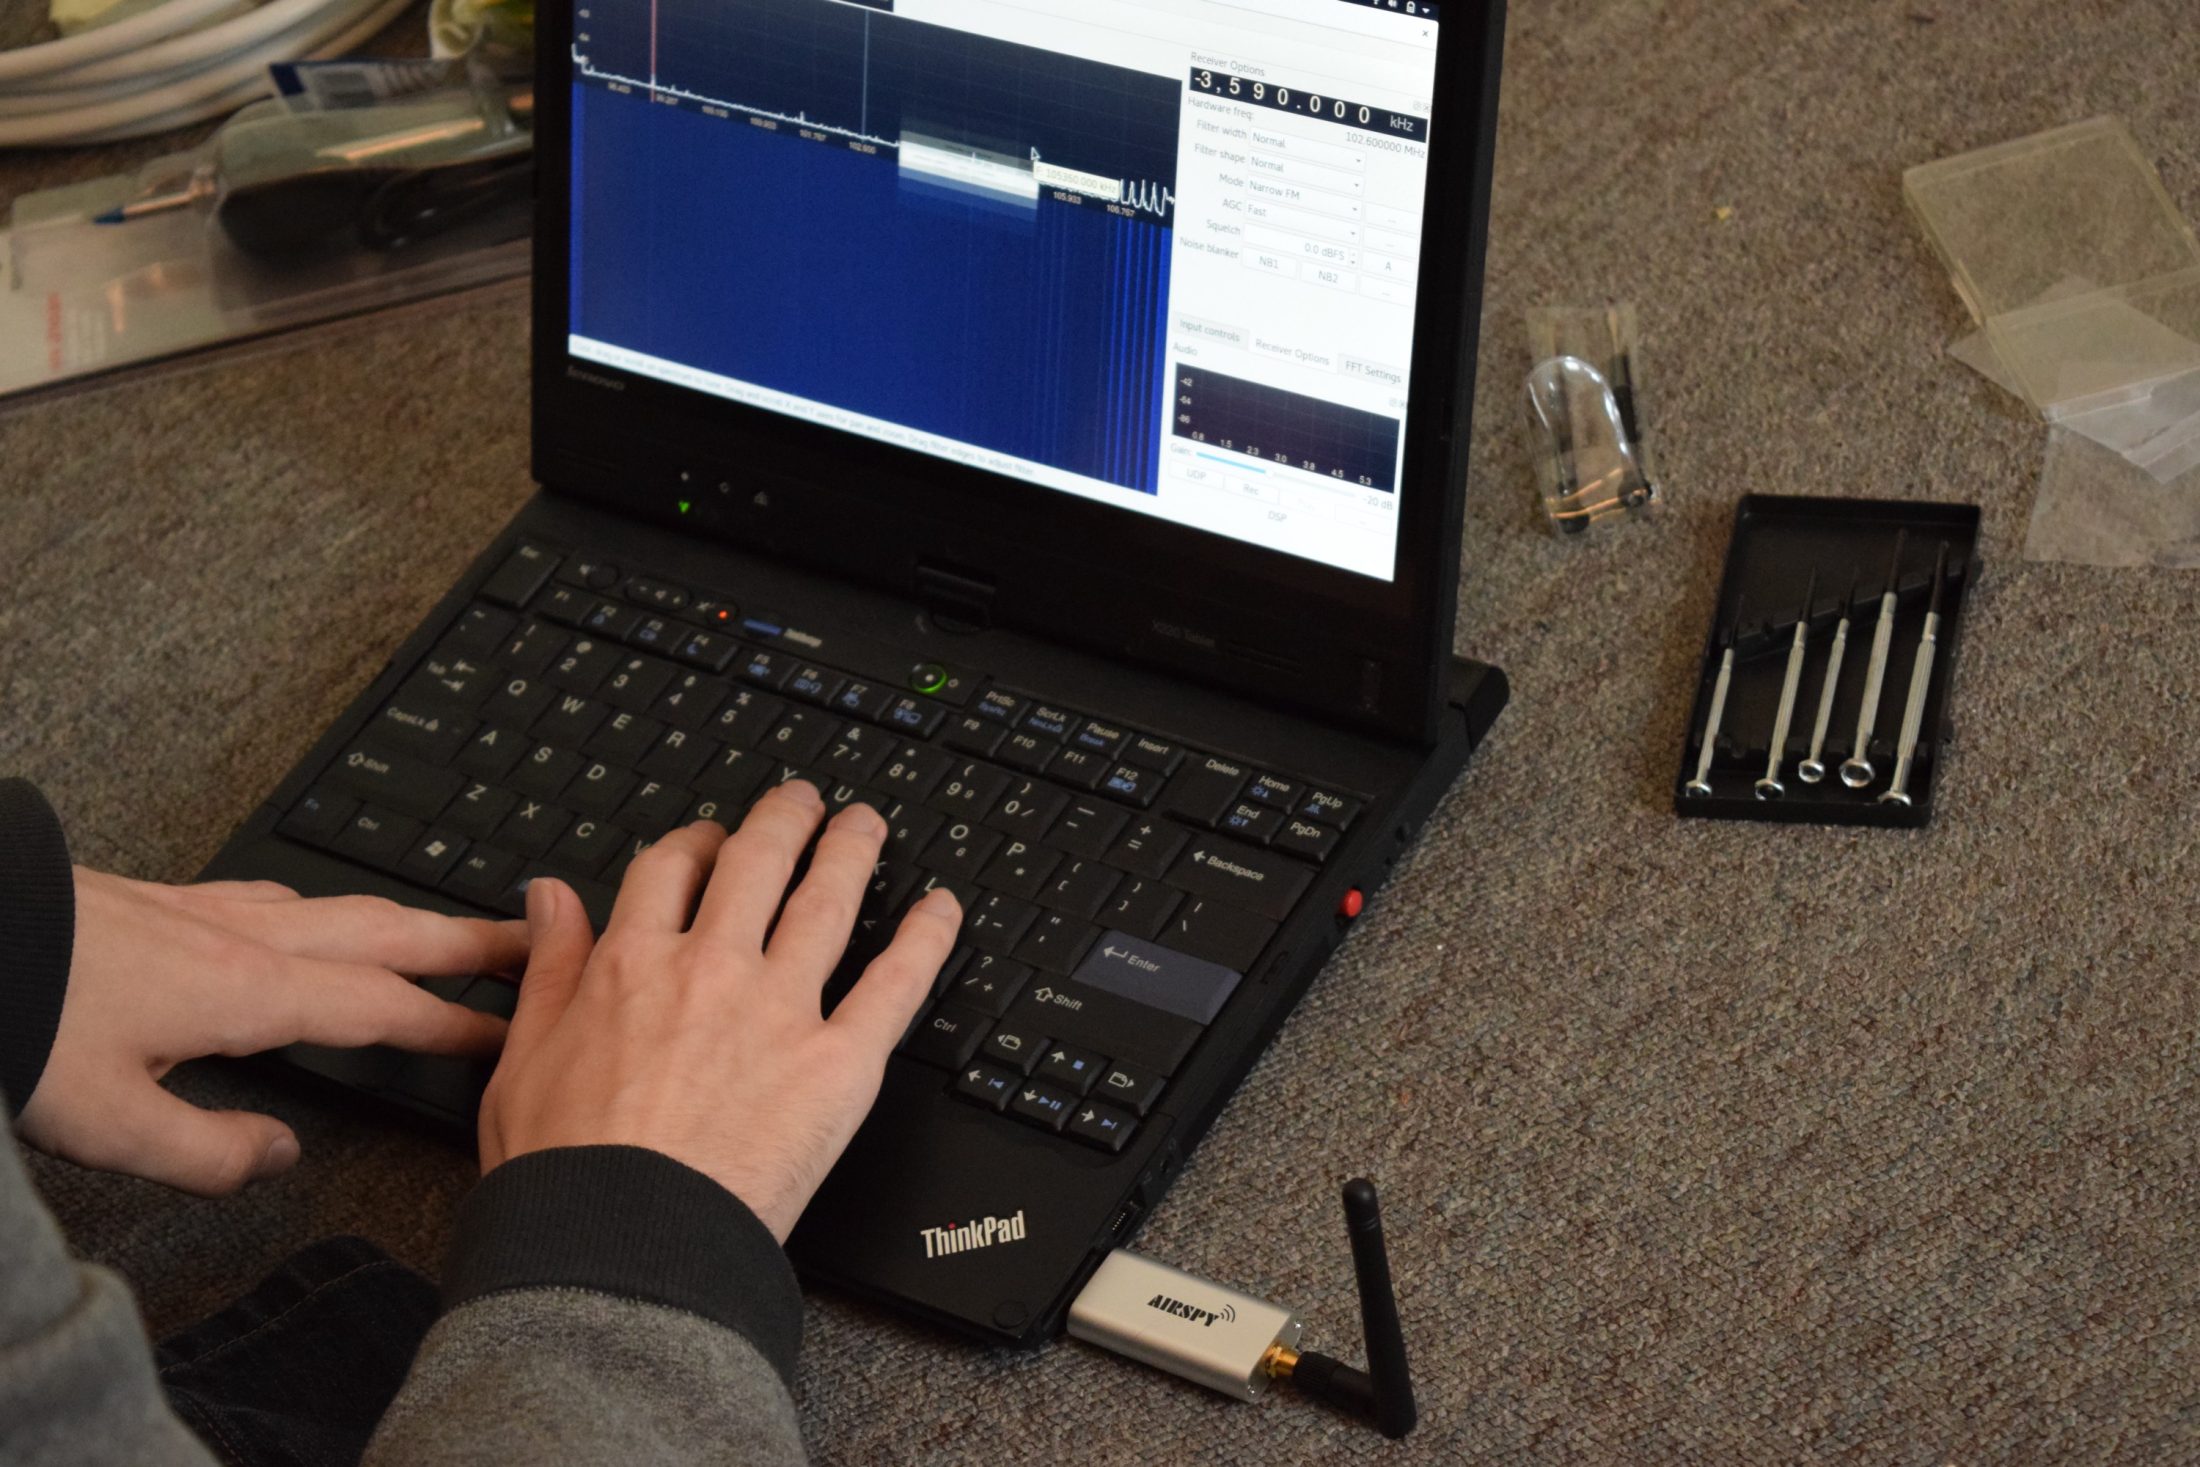
By the way, there are various applications that the Airspy can work with — many people use SDR#, but if you’re on Mac or Linux, then gqrx is a bit easier to get up and running. That’s what we’re using here.
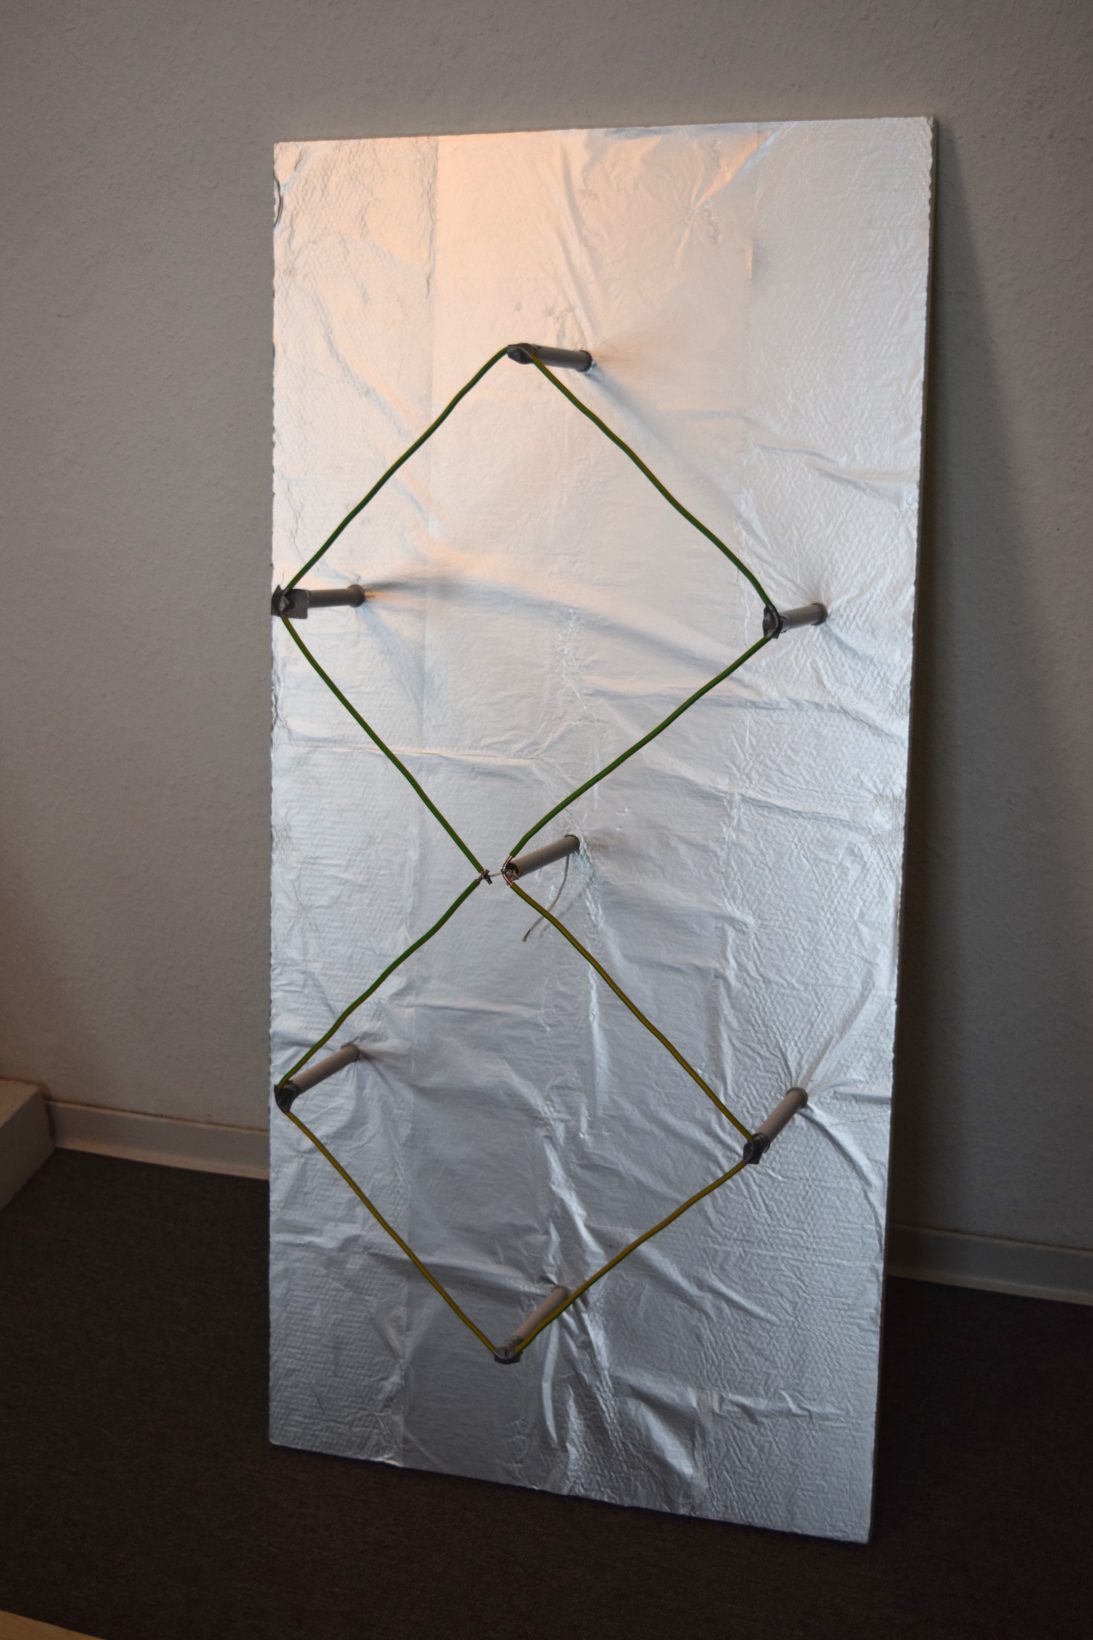
Step 2: Bend some wires.
Using the Changpuak calculators, bend the wire into the appropriate size and shape in order to receive a signal at 237 Mhz (the frequency at which the LES-1 transmits).
For further antenna guidance we also consulted the Antennenbuch, published in 1963 (a gift from Ulrich Seipelt, of Funktechnik Seipelt, in Hönow, Berlin, who has been an invaluable source of help for us in getting started with our antennas).
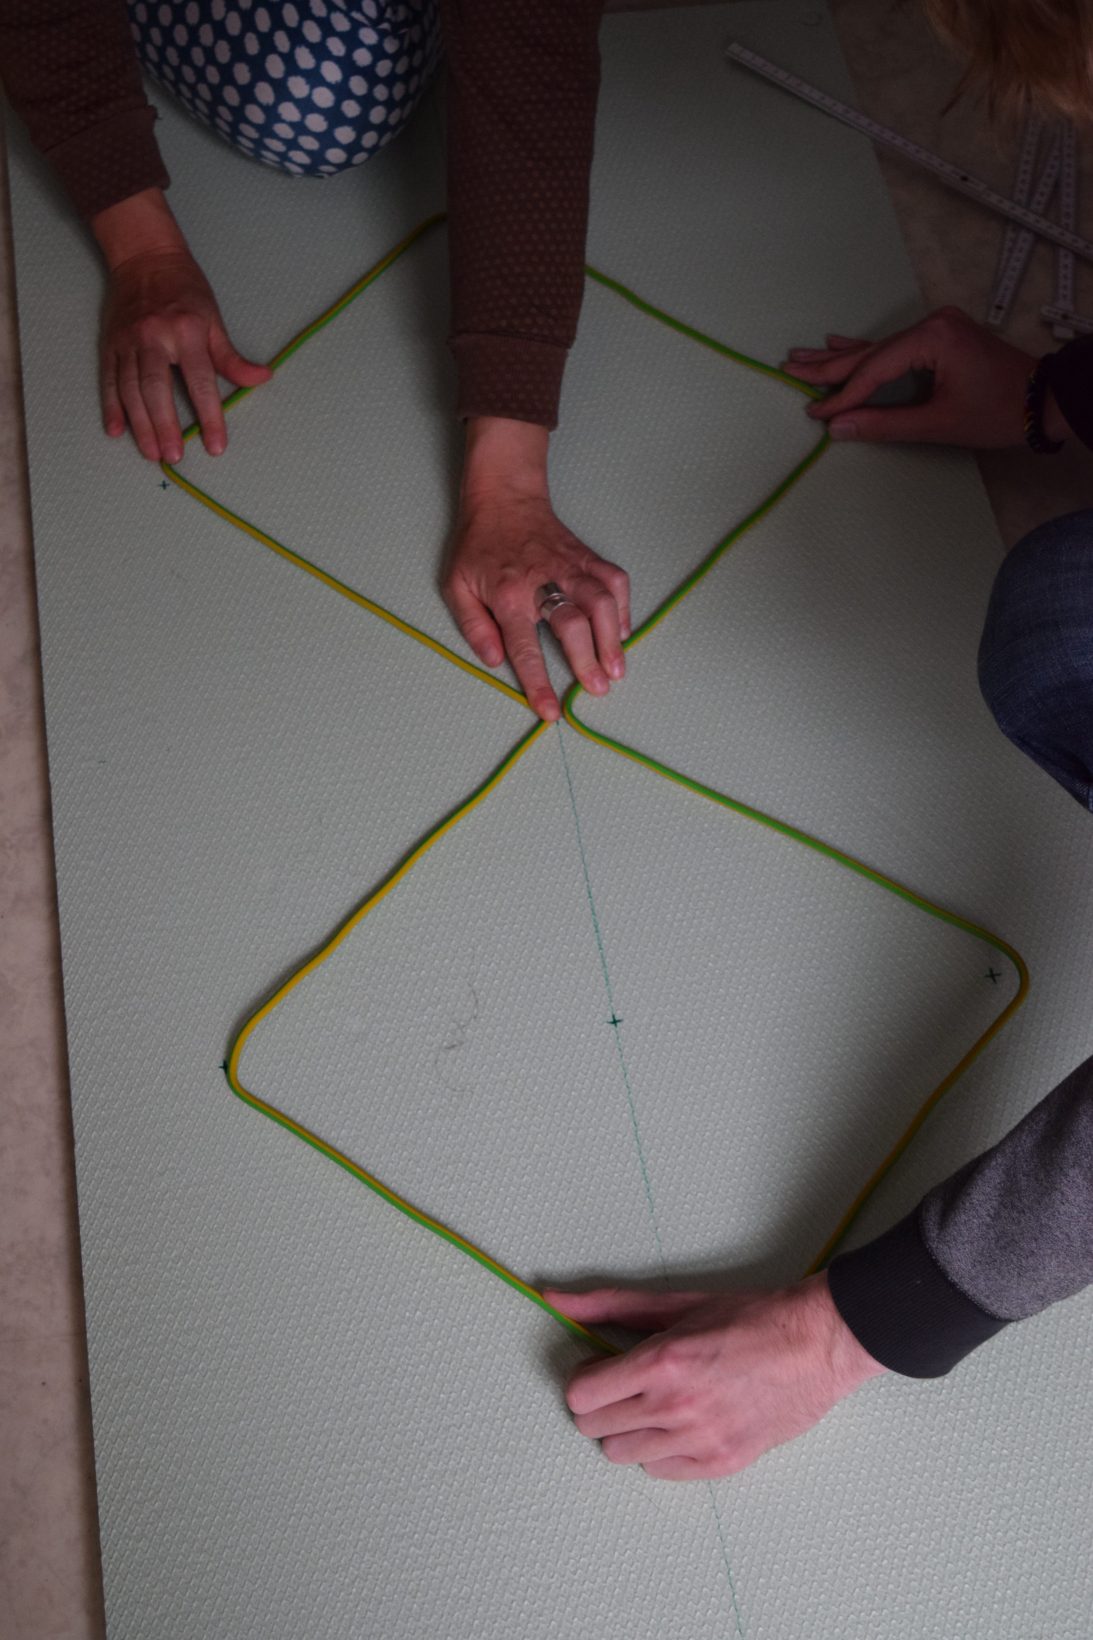
Step 3: Measure twice, cut once.
Measure the right things to the right places and dig holes. Make sure the holes are not too wide. Also, cut the plastic tubes to the right size.
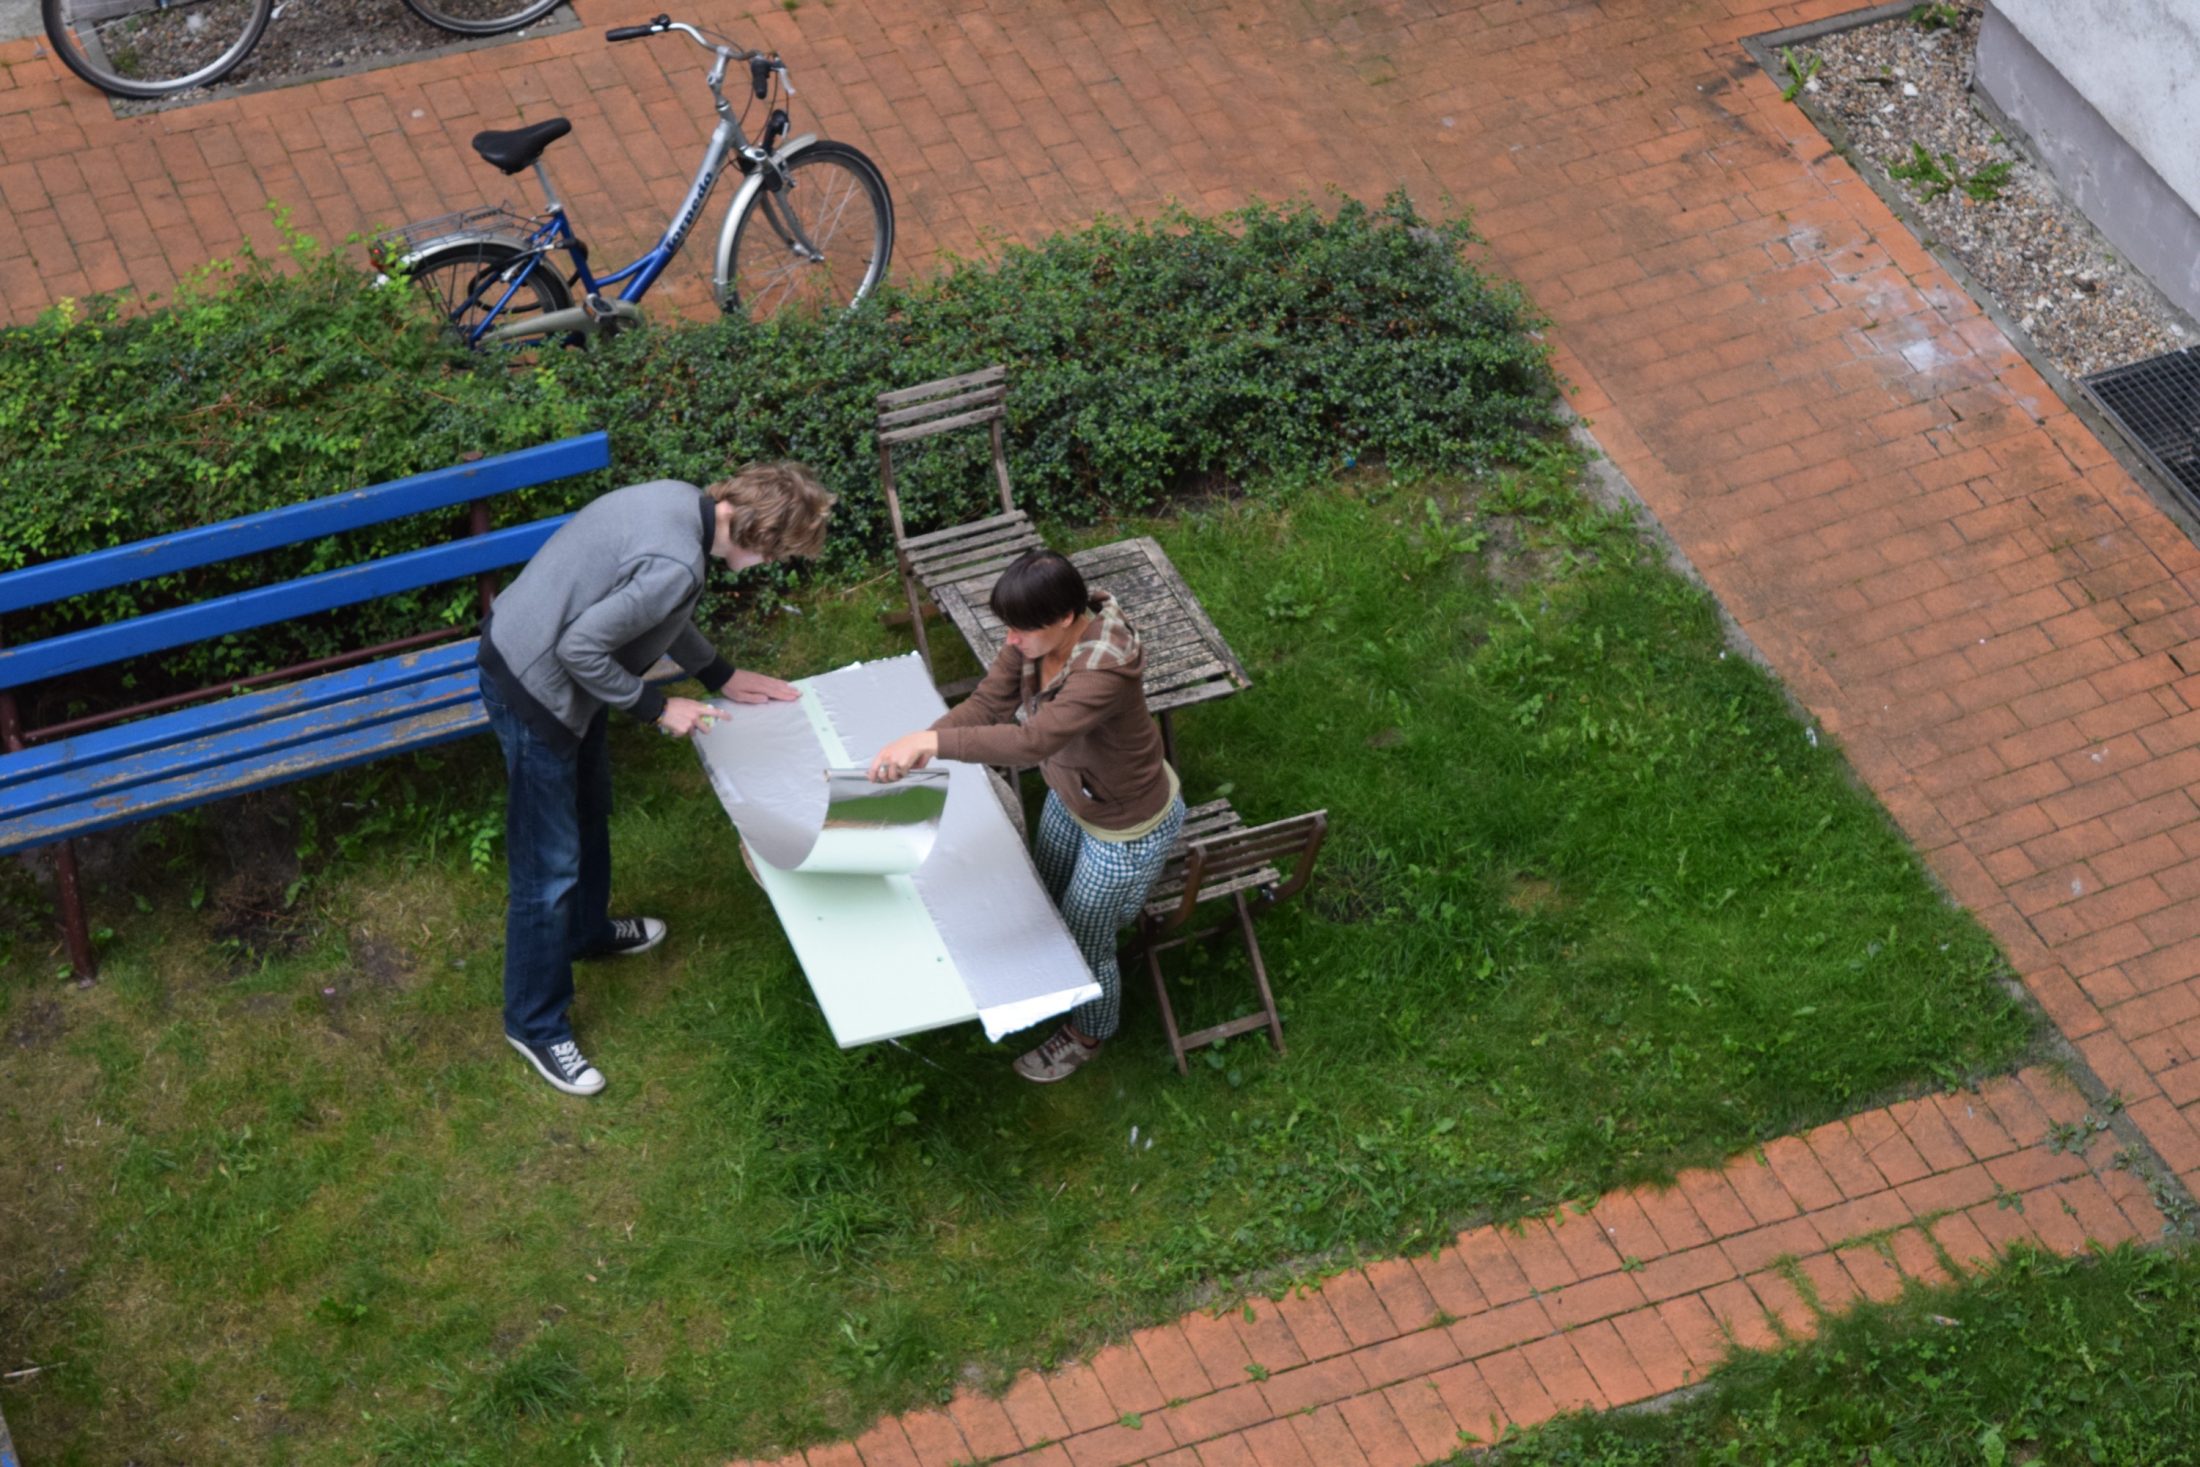
Step 4: Glue things.
Glue aluminium foil on your foam. Best done outdoors.
Step 5: Go to the other room to get something. And, as you come back, fall over, straight onto the reflector. Laugh. Have a glass of good whisky. Take a break. Think about next steps. Then finish the front of the antenna by soldering the ends to the cables. Test how it works. (Working pretty well as a radio antenna.)
Step 6: Fix up the reflector board, and put it all together.
Next job: build Heather, our second antenna.